How to Use
We will introduce the basic flow and the role and function of each button.
Recommended Panel Layout
My personal favorite panel layouts for working with SDFusion:
- 3D Viewport
- Outliner
- Properties
- Asset Browser
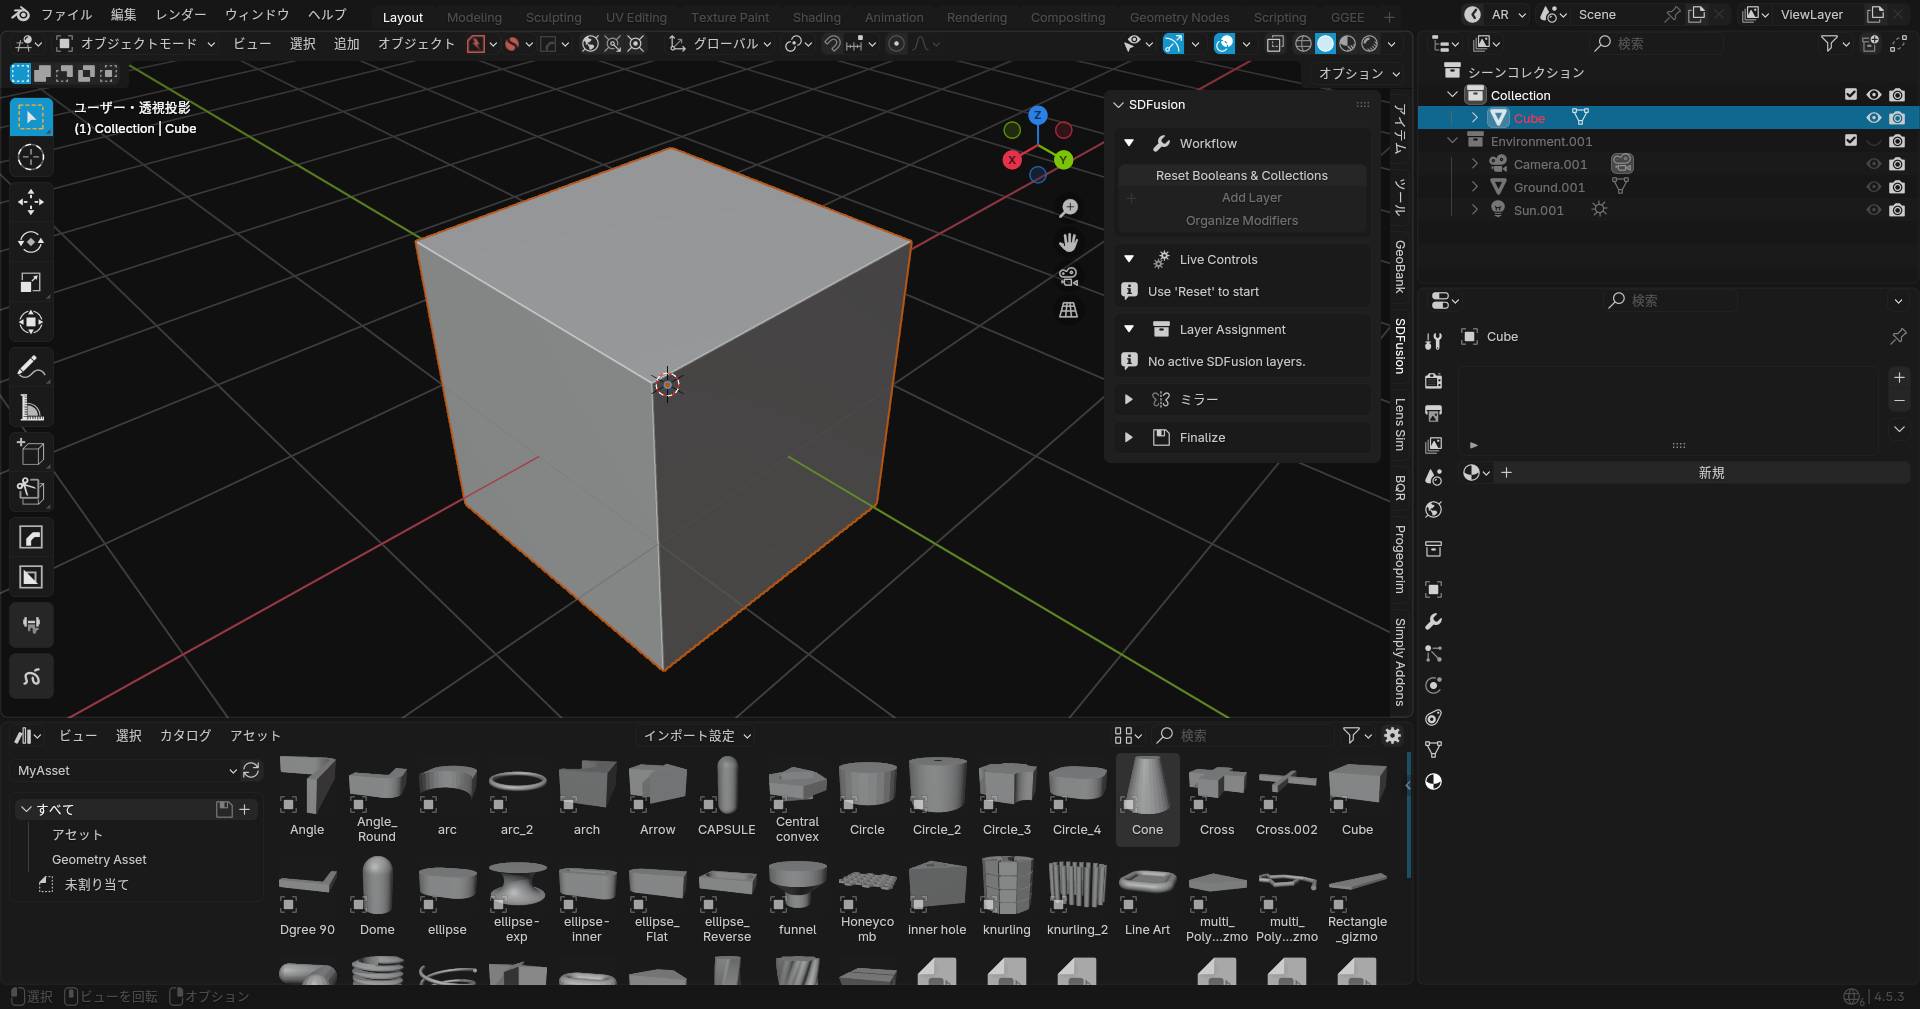
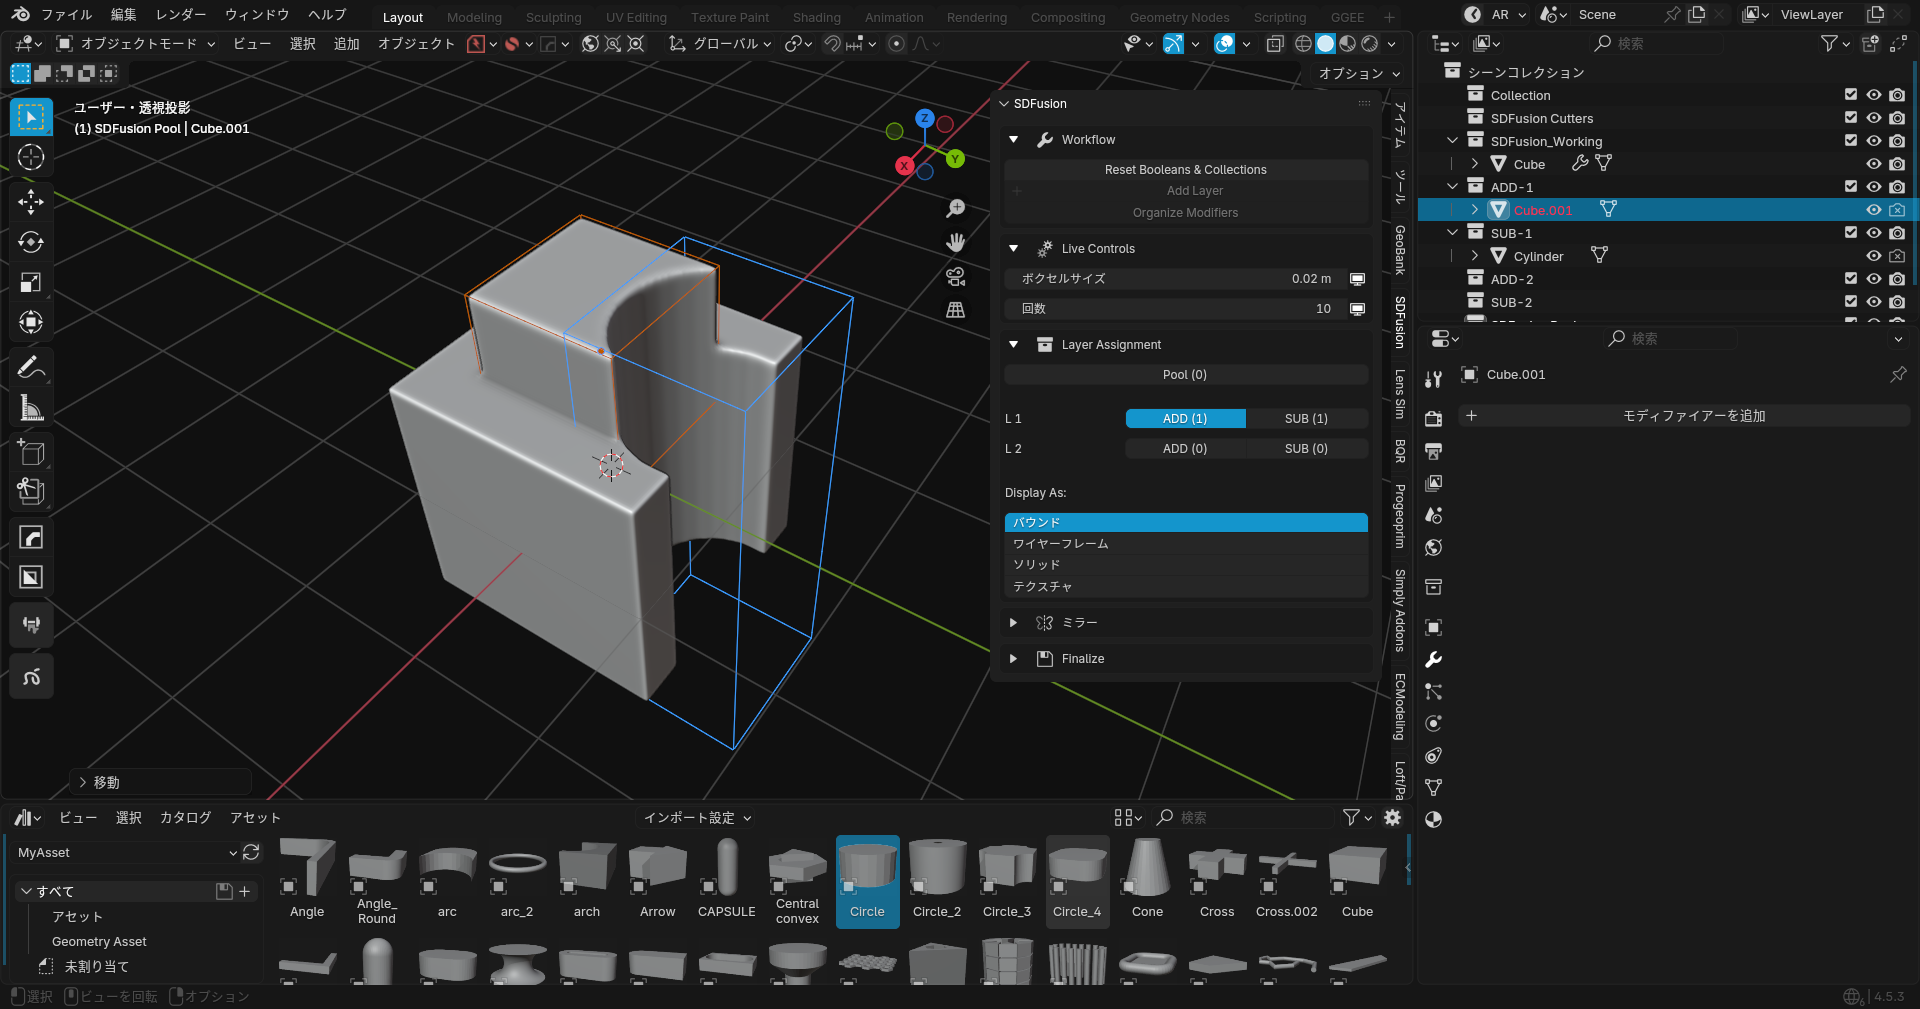
Find SDFusion on N-panel
The SDFusion panel is located in the 3D Viewport sidebar. Press N to toggle the sidebar, then find the SDFusion tab.
Since it can get buried among various add-ons, finding it is the starting point.
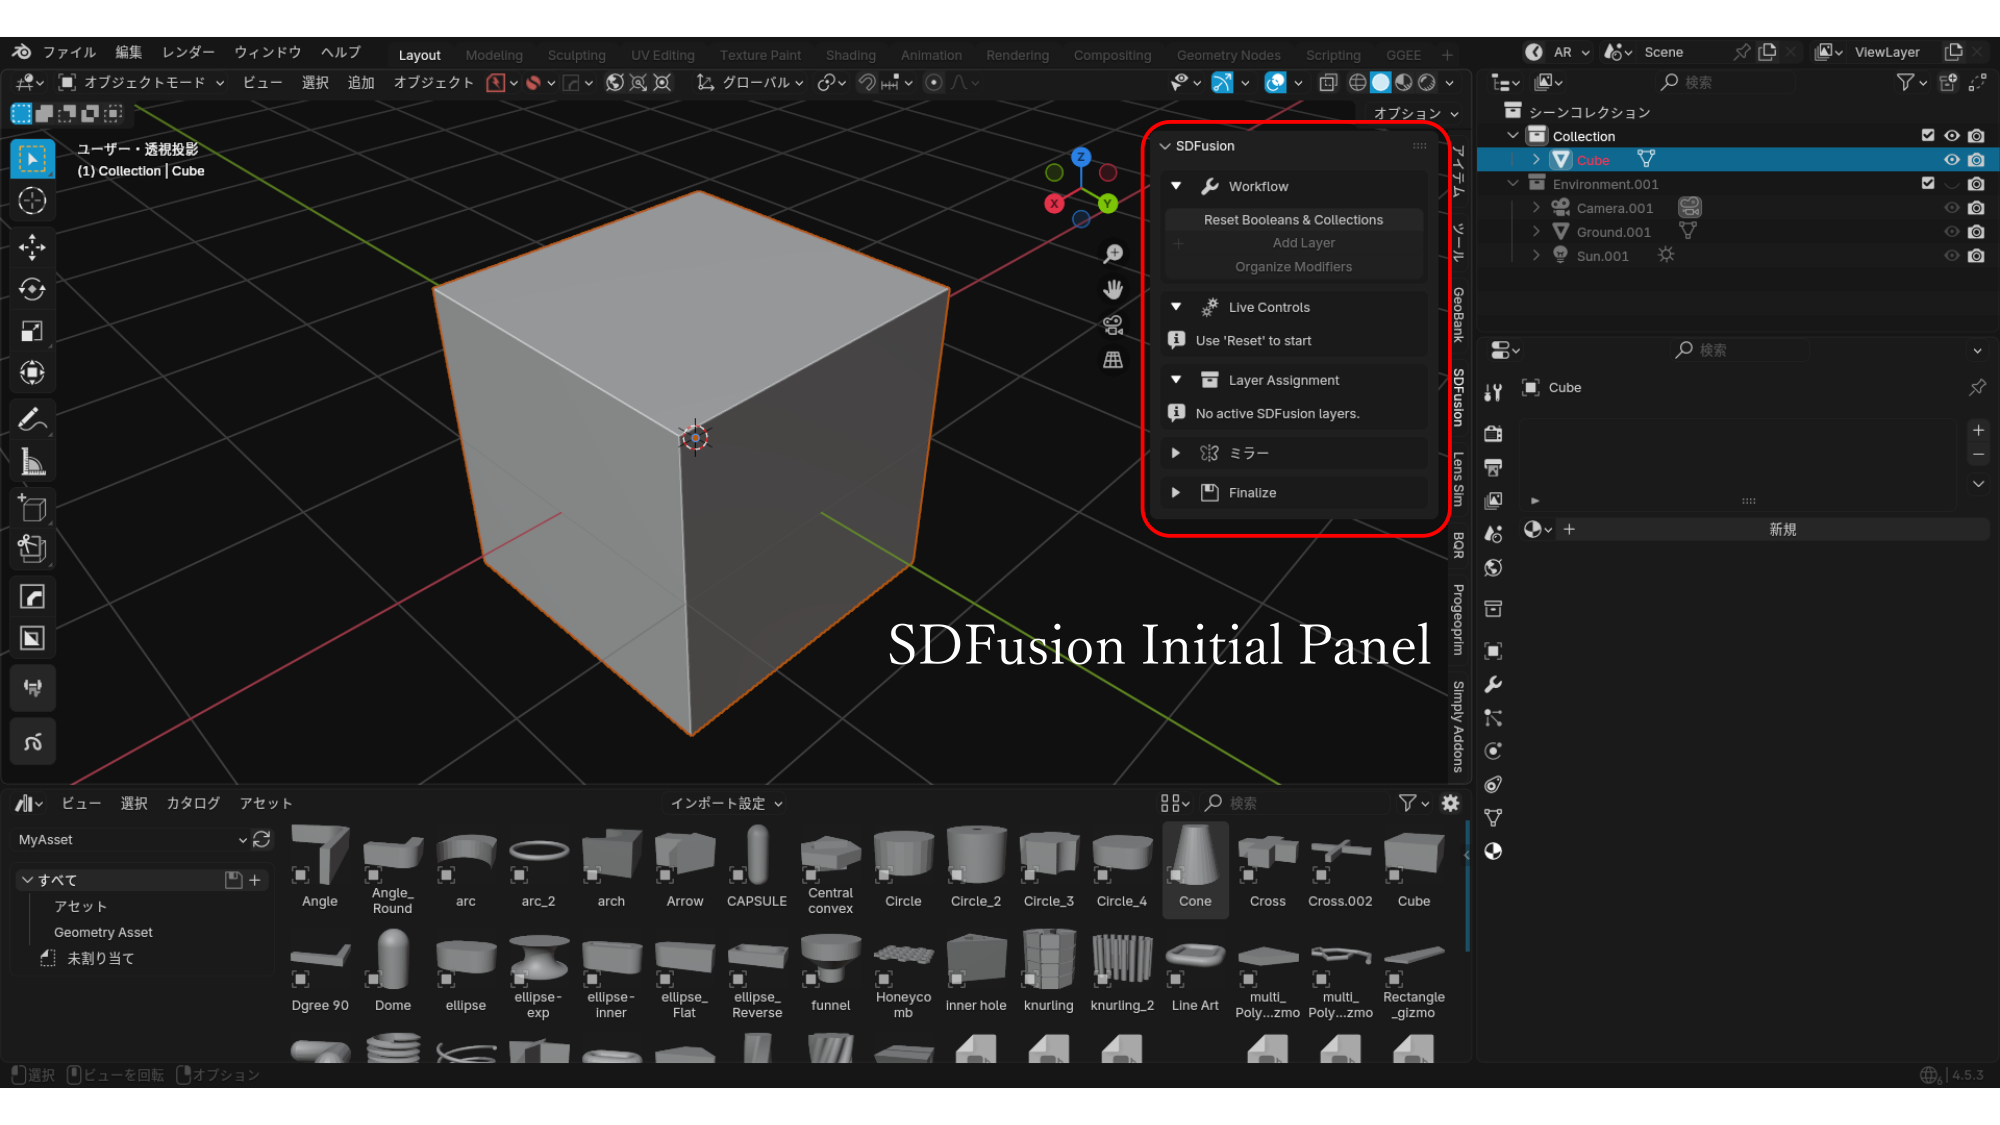
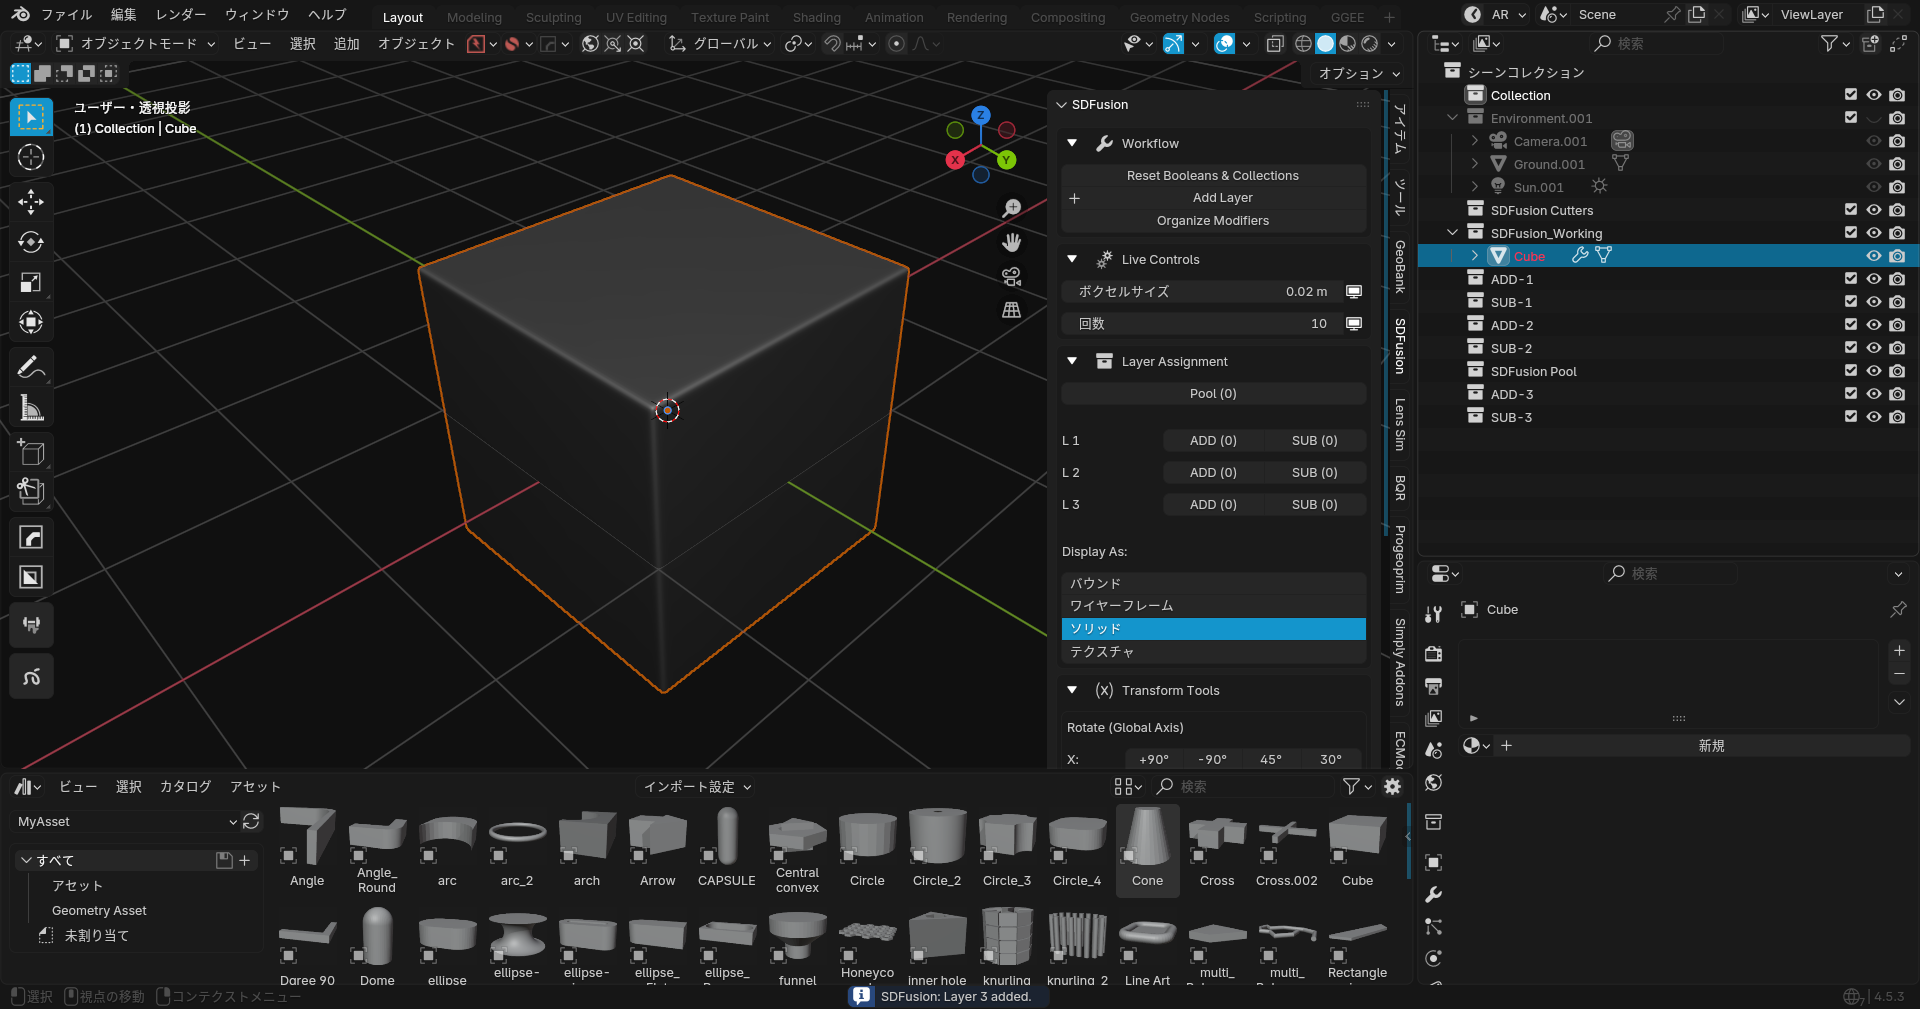
Getting Started: Reset Booleans & Collections
- Select a mesh object
- Click "Reset Booleans & Collections" in the Workflow section
This creates:
Collections in Outliner: - SDFusion Cutters: Storage for Boolean processing objects - SDFusion_Working: Storage for objects currently being worked on - ADD-x: Storage for objects used for addition (Union) - SUB-x: Storage for objects used for subtraction (Difference) - SDFusion Pool: Storage for temporarily removing objects from processing
Modifiers in Properties: - Boolean modifiers for each layer - GeoRemesh (geometry node-based) for smoothing and remeshing
This add-on primarily uses a workflow based on stacking existing modifiers.
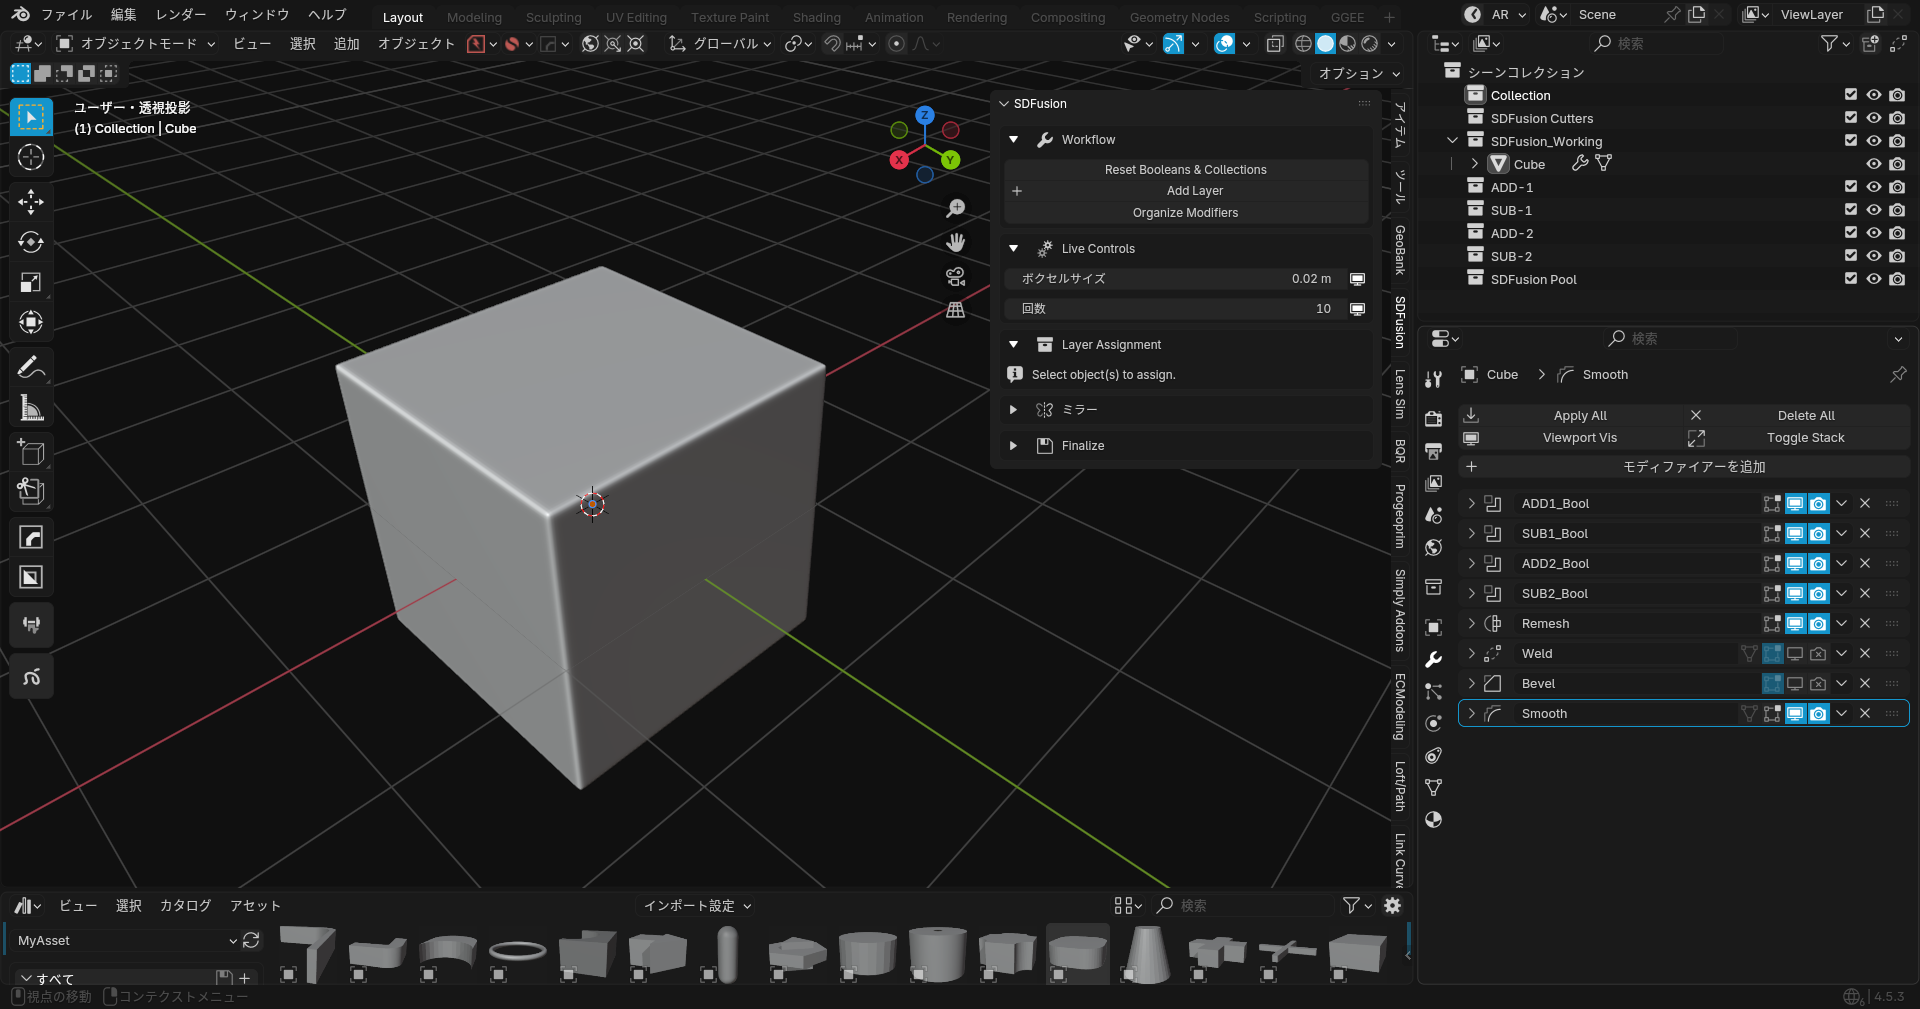
Tutorial: Making a Hole in a Cube
Step 1: Add a Cylinder
Add a cylinder. At this point, it's just placed in the scene.
Step 2: Assign to SUB Layer
- Select the cylinder
- Click the SUB button in Layer Assignment
- The cylinder will display as wireframe

At this stage, nothing is finalized. Moving the cylindrical wireframe will shift the hole's position in real-time.

Step 3: Add Another Shape
- Add a cube
- Adjust position and scale
- Click ADD button in the N-Panel
- The display changes to wireframe
Step 4: Using Multiple Layers
You can change layer assignments to control the order of operations.

This add-on aims to display the stack of Boolean modifiers as layers, making it easier to process additions and subtractions hierarchically.
Adjusting with Live Controls
The Live Controls section lets you adjust the GeoRemesh parameters in real-time:
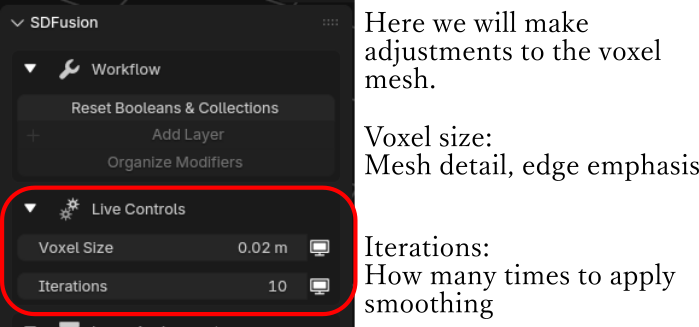
- Mesh Density: Controls the resolution of the remeshed result. Higher = more detail.
- Smoothing: Amount of smoothing applied to the mesh. Higher = smoother.
- Sharp: Controls the sharpness of edges. Higher = crisper edges.
- Edge Angle Parameter: Threshold angle for edge detection.
Tip: Start with lower Mesh Density for faster preview, then increase when finalizing.
Finalize Tab
Open the Finalize tab when you're ready to complete your model.
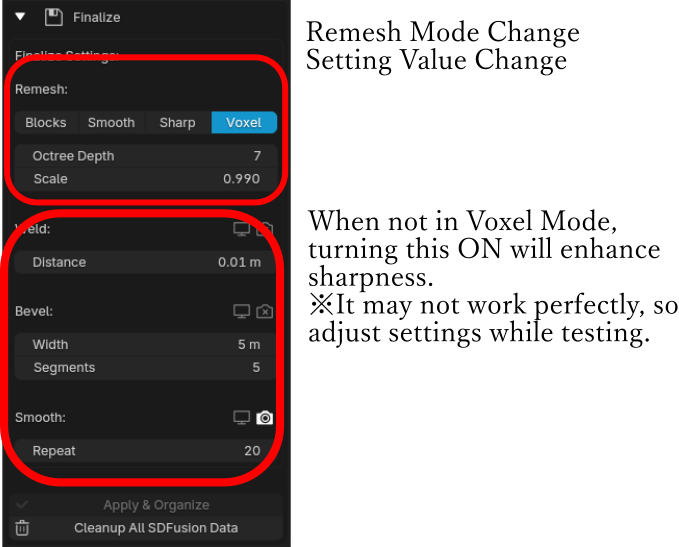
- Apply All: Applies all modifiers and generates the final mesh
- Cleanup All: Removes temporary collections and objects
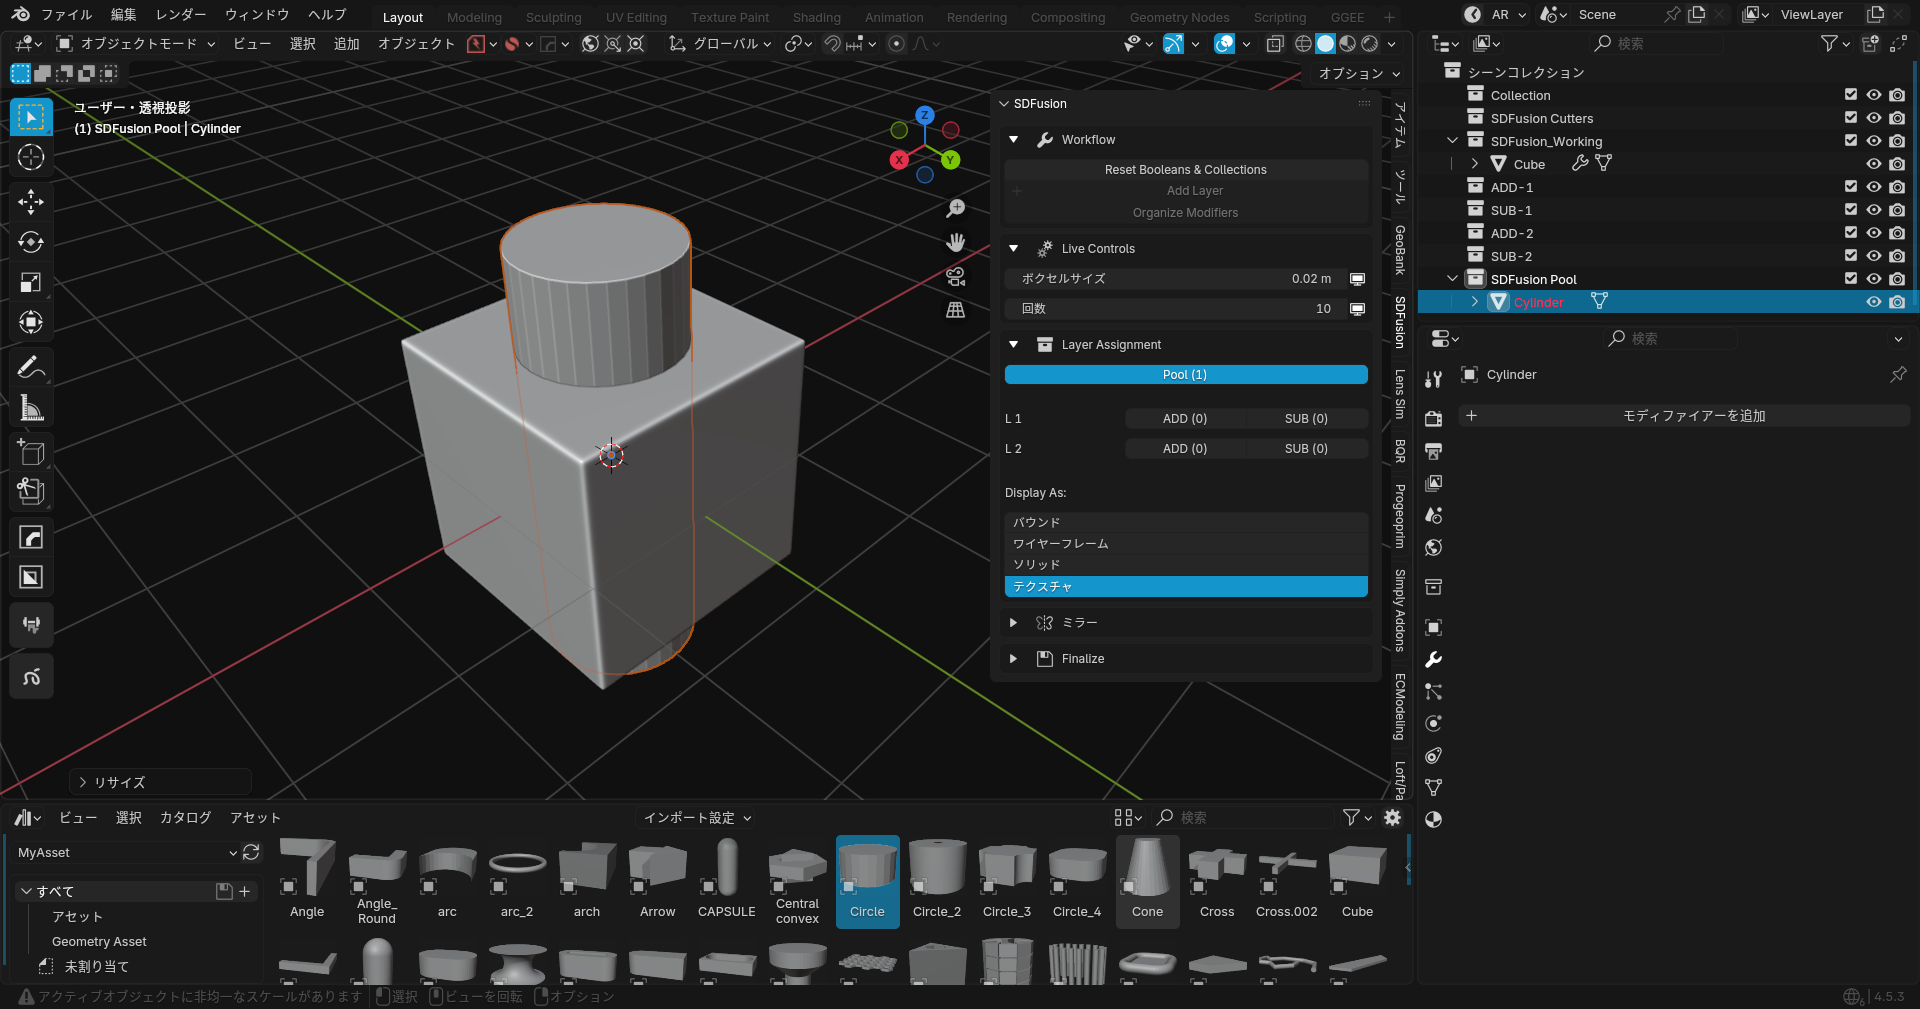
Other Features
Add Layer
Add more Boolean hierarchy levels. Pressing once adds a new ADD and SUB pair.
This enables modeling using even deeper layers for complex details.
Transform Tools

Rotation (Global Axis): - Quick rotate buttons: +90°, -90°, 45°, 30° for X/Y/Z axes
Position: - Move to World Origin: Set X, Y, or Z to 0 - Align to 3D Cursor: Match X, Y, or Z to cursor position
Display Options: - Display Type: Switch between Solid/Wireframe/Bounds - Overlay Wireframe: Toggle wireframe overlay on/off
Location & Rotation: Direct input fields for precise adjustments.
Note: We've discontinued the Mirror Modifier settings and incorporated them into Transform-related options for more intuitive adjustments.
Useful Companion Add-ons
For add-ons that work well together with SDFusion, please also refer to Other.
Next : Gallery